
-
My Mother’s Cookies
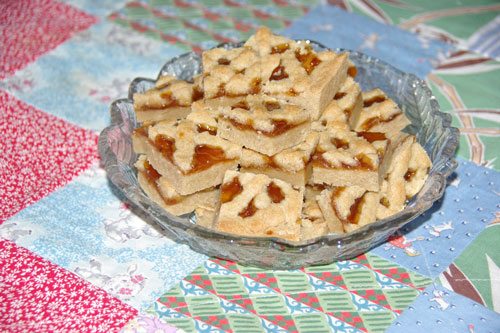 I know this is supposed to be a quilting blog, and these cookies have a “lattice,” so does that make these quilted cookies? These are my favorite cookie and everyone to whom I give them have made them a favorite, as well.
When our daughter asked me for this recipe, I thought it wouldn’t hurt to post the recipe and procedure. A couple years ago I took pictures of the process, so it was easy to get them up on the Blog. My mother would be 100 on December 30 this year and I think this would be a nice way to honor her since this was her signature recipe.
She called them Jelly Squares. She baked several kinds of cookies at Christmas, but these seemed to be ones that she made for any occasion through the years, besides Christmas. It did not need to be a “special” occasion, either. These were made for sick friends or when she would go visiting.
Then there were the yeast, pound cakes and other cookies that she made. She bought flour by the 25-pound sacks, that were emptied into a very large metal container, she kept under the sink. I thought that she learned to bake from my Grandmother because the family had a bakery in Germany. However, she was only 14 when she immigrated to this country in 1928 and worked for a Jewish family in Chicago. After thinking about the recipes she left behind and her stories, I realized she probably learned how to bake in that household.
There was no exact recipe for these cookies. It was all by feel. My sister and I finally sat with her as she made them and figured out the amounts. When I made them myself the first time I measured 4 cups of flour, the way it says in the cookbooks, spoon the flour into the cup and level it off. I ended up adding flour because the dough was too soft. Next time I tried her technique of measuring flour, dipping into the bag and leveling the cup with a knife. Perfect!
Finally, I decided to weigh those dipped and leveled cups of flour, to get an exact amount. It comes out to 19-1/2 ounces or 4 cups at 4-1/2 ounces each, plus an ounce. The last time I made them, I used 18 ounces and the dough was just right, soft, but not too soft. So if you add a little more flour it won’t hurt. She also rounded all her spice measurements, so I do the same.
I have tried other jams on these, but I prefer the apricot jam. A friend made them with marionberry jam, a type of blackberry, and thought it was very good. It needs to be a seedless jam.
I never realized there were so many steps to making these cookies, translating into about 2 hours, from start to removal from the oven. However, making these cookies reminds me of the warm spicy aromas wafting from my Mother’s kitchen, so it is worth the time and effort. Your house will smell so good!
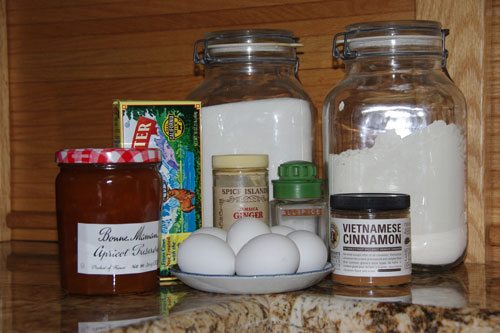
- 1 ¼ cups sugar
- ½ teaspoon ground ginger, rounded
- 1 teaspoon ground cinnamon, rounded, this one is a stronger cinnamon from King Arthur Flour, in the past, I have used several different brands.
- 1 teaspoon ground allspice, rounded
- 1 pinch ground cloves (optional) I didn’t show it because I don’t use it.
- 1 pound salted or sweet butter if using sweet butter add 1/8 teaspoon salt.
- 4 cups all-purpose flour, dip cup into flour and level with a knife or weight should be 18 ounces.
- 6 Egg yolks, save whites for another purpose, see notes below.
- 1 cup apricot jam, approximately. This is one I picked up at Costco. In the past they carried Smuckers, but any store brand will do. If there are large chunks of fruit in it, give it a whirl in the blender.
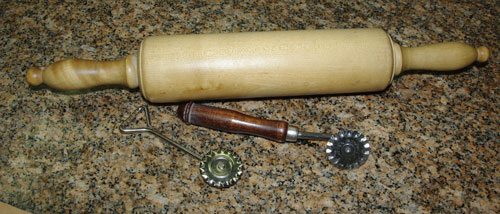
Here are two essential tools needed to make these cookies, a rolling pin, and a pastry cutter/crimper. The metal one is from my mother. Below I have illustrated only the steps that pertain to this recipe.
1. Stir spices into sugar.
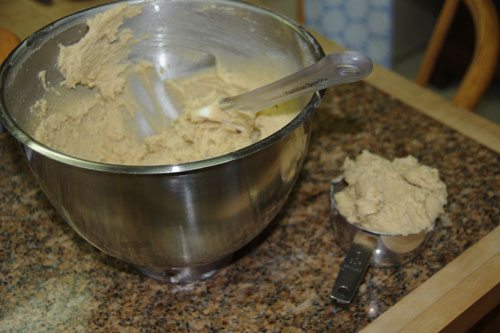
2. Cream butter, add sugar mixture.
3. Alternately add flour with egg yolks. Mix well, scraping bowl. The dough will be soft.
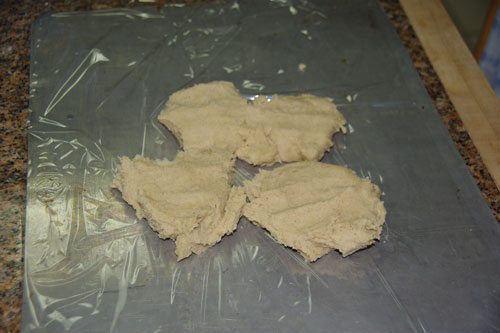
4. Remove approximately one cup of dough.
5. On a rimless cookie sheet, place one sheet of plastic wrap. Plop spoonfuls of the cup of dough, on the sheet.
 6. Cover with another sheet of plastic wrap and press them down. Place a wet cloth or a rubber slip-free sheet under the cookie sheet to keep the sheet from slipping as you roll out the dough.
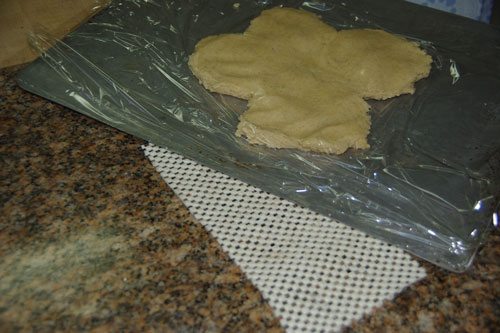
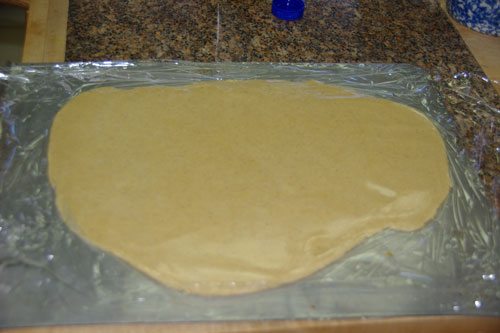
7. Roll out the dough between these two sheets of plastic wrap, to about 1/8″ thickness.
- As you roll the top sheet may get folded into the dough, just pick it up and spread it over the rolled dough. Otherwise, when you lift the sheet to cut the strips, there will be dough caught in the folds.
- You might want to turn it over and straighten out the bottom sheet, as well.
- Using a heavier plastic wrap may not make this necessary, as mine is thin.
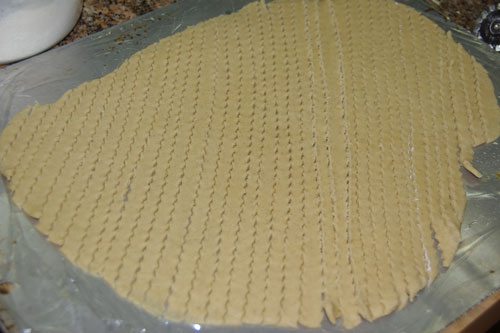
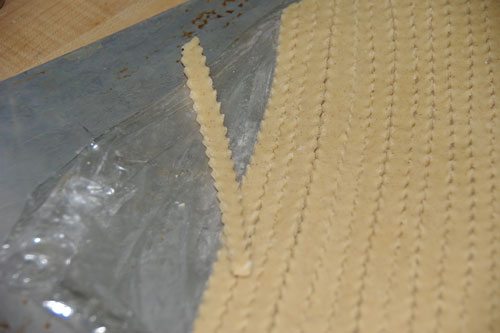
 8. Remove top sheet. With the pastry cutter/crimper cut the dough into 1/4″ strips. Mine got a little wider in spots, but try for 1/4″ or so.
 9. Place cookie sheet and strips in the freezer for about 10 minutes and turn the oven to preheat at 350°.
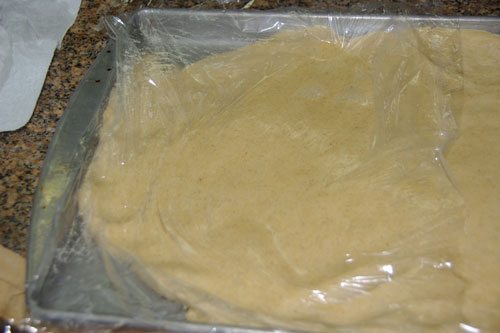
10. While the strips are freezing and the oven is heating, drop large spoonfuls spaced apart on an ungreased *10-1/2″x15-1/2″ jelly roll pan. Lay a long piece of plastic wrap over the dough clumps and press the dough into the bottom of the pan. You could also use plastic throw away gloves. The dough is very soft and sticky and this is the best way to press it in place, without getting it all over your hands.
- This is the pan size I used, you could use a larger one, but the cookies will be thinner, and the baking time should be slightly shorter.
 11. The dough should be fairly even, allowing a slight rise at the edges, enough so the jam can’t run underneath, it doesn’t have to be exactly the same along the edge.
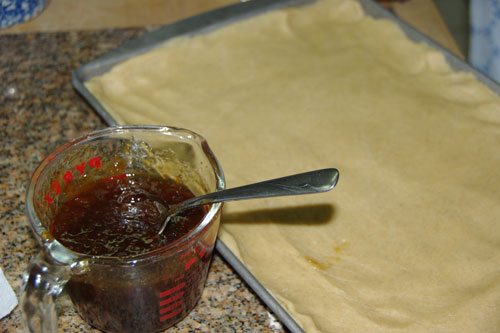 12. Heat jam in the microwave for less than a minute, just enough to slightly liquify it enough to spread easily. Stir well.
13. Spread jam over the dough within 1/2″ or so of edge.
 14. Remove strips from the freezer. They break apart easily, by lifting the plastic sheet.
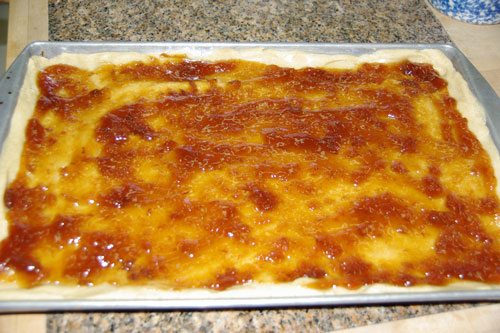
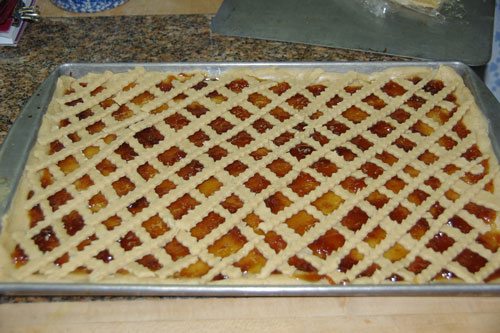
 15. Lay strips diagonally on the jam about 1″ apart in one direction. Then lay them across in the opposite direction to make a lattice. These are not woven like you might for a pie, simply laid across the surface.
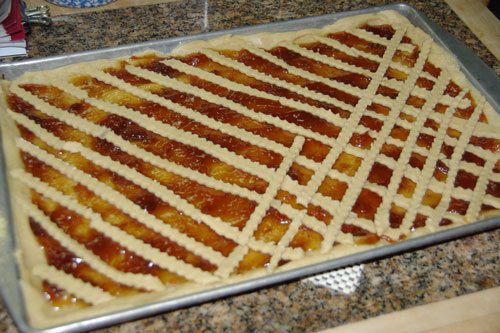
- This step does not have to be perfect because once the cookies are cut up only a small amount of lattice shows on each cookie. If a piece breaks just lay another one touching the ends together. As it bakes the dough expands and the ends are joined.
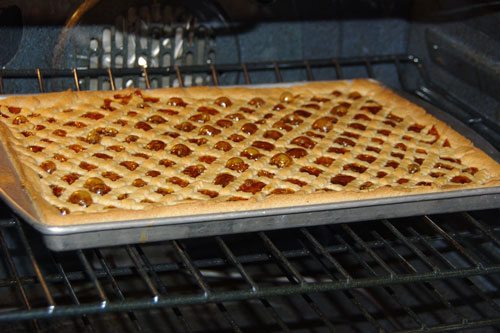
 16. Bake for 25-30 minutes. The dough pulls slightly away from the edges of the pan and should be a light golden brown. Don’t overbake. Isn’t it pretty?
 17. Cool completely in pan. When cool, cover with plastic wrap or aluminum foil. Let set for at least 24 hours before cutting into 1-1/4″ squares.
18. Store in airtight containers with plastic wrap or parchment paper between the layers, to prevent layers from sticking together.
Note:
- These cookies freeze beautifully. Place plastic wrap between the layers.
- Egg whites can be used to make FORGOTTEN cookies or other cookies that require only egg whites.
- Freeze the egg whites in the amounts needed for various recipes.
- For example, freeze two whites in a small container, thaw and add to omelets, in place of one egg, makes them lighter.
Tags: Christmas, cookies, jellysquares


