
-
Scrappy Escher Triangles
Here is the quilt I told you I was working on. Designing Tessellations from Jinny Beyer has been a fascinating source and then there is Symmetry from Ruth McDowell. Look at some Escher designs on the internet, just to get some idea of how tessellations can be used for quilting designs. Lots of fun and lots of ideas. Take a look at this page.
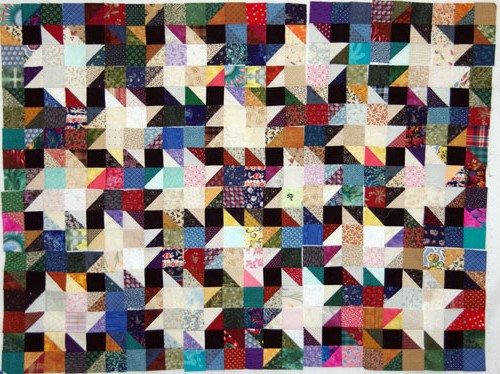
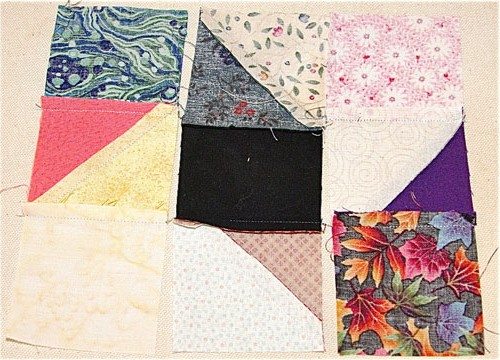
I love quilts with Half Square Triangles. I am calling this an Escher design, because the dark and light stars interlock with each other.
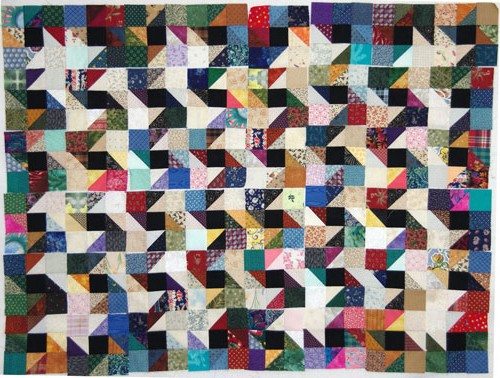
I wanted to wait to show you until it was all put together, but I couldn’t wait. I also wanted to show another way of setting the blocks together. To make the stars pop out, you have to rotate every other block. If you don’t rotate, you get ribbons or maybe those are dragons. I think the stars look more interesting. Maybe if the darks and lights were more controlled, the design would pop, but it’s more of a hodge-podge, what do you think?
Then I realized that this would be a good quilt for Jelly Rolls, since they are cut 2 1/2″ wide. I wouldn’t have to cut the strips, just squares from the pre-cut strips, but how would I make Half Square Triangles to finish at 2 1/2″ square as well? You have to keep reading to learn that little trick.
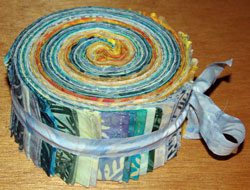
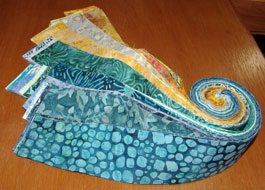
I saw this great Batik Jelly Roll at Debbie’s Fabrics, Etc., in Tehachapi. Isn’t it beautiful? I couldn’t resist.
Now how to plan it out! I would like to use the whole roll, don’t know if that will be possible.
If you would like to put the scrap quilt together yourself, here’s how I did it.
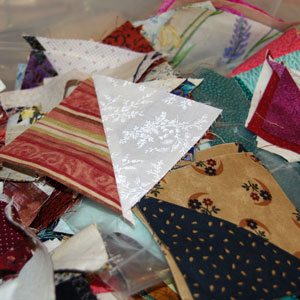
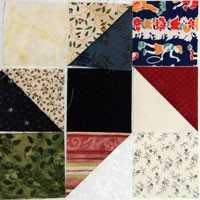
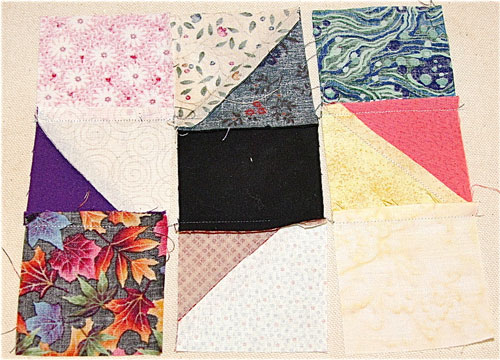
I pulled out my box of Half Square Triangles, and dumped them on the table. If you don’t have this kind of collection, then you will have to make them any way you know how, from lots of dark, light and medium fabrics.
You can also use the technique that I will be showing you. The point is that they need to be made from MANY different fabrics.
Sorted them into three sizes: 2 1/2″, larger to be trimmed down to 2 1/2″ and smaller ones that are going into a bag, for the Quilt Guild Free Table. Since most of them were already made as 2 1/2″ squares, decided to go with that size! Then I dipped into my stash for the squares, didn’t make a dent! Although, I really cleaned out my box of Half Square Triangles. The black fabric is a batik from Batiks Plus. Love their fabrics, but it is a dangerous website! Really can put a dent in your budget!
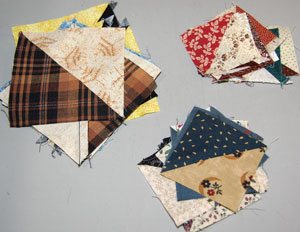
You need TWO different blocks.
Center Block 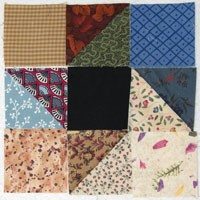
Edge Block When sewing the blocks together make sure that the Half Square Triangles (HST) twirl around the center block. I used black, but you could use any dark color, as long as you don’t use it anywhere else in the quilt, except for the border if you wish. That is what I have decided to use.
Chain sew each block vertically, so the patches hang together. Sew the top left to the top center, the center left to the center, bottom left to the bottom center. Then sew the center patches to the right patches. Do not cut the threads between the patches. When you are done, the patches will be in the correct order so you then sew the horizontal seams. Press the seam allowances from the front of the block so the center row is opposite the two side rows.
 When you sew these seams, you need to pin them when the top seam faces away from the machine foot. Pin through the top seam allowance in the seam allowance, come up through the fabric on the other side of the underneath seam allowance.
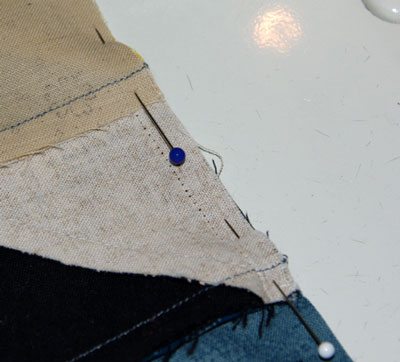
From the front slip the pin through the seam allowance. 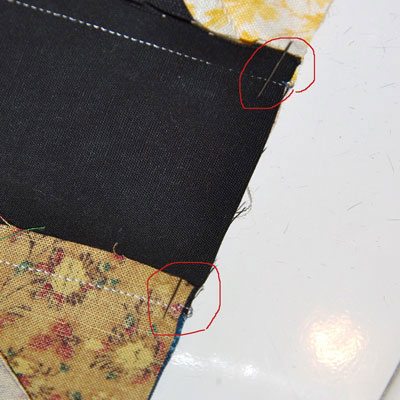
On the back the pin is slipped past the seam allowance. Do not pin through the seam allowance. When you sew, the pin is out of the way of the needle, but keeps the underneath seam allowance from being twisted by the feed dogs. Sew across the underneath seam allowance and pull out the pin, with the needle down, to avoid pulling the patch out of alignment. Since the pin is out in the seam allowance the foot is on top of it, so you may have to give it an extra tug, another reason for keeping the needle down.
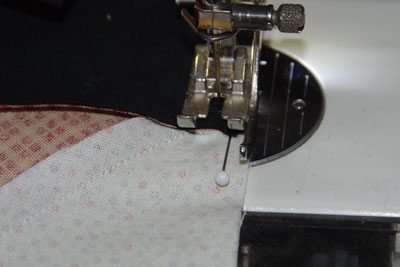
The other seam the seam allowance faces the machine foot, so it usually goes into place very nicely, without pinning, you can pin, no harm, but usually not necessary.
I will get the quilt sewn together in the next few days because I am really anxious to start on the batiks.
Here is the link scrappy_escher for the little quilt I just showed you, it is a PDF file.
Half Square Triangles from Rectangles (HST)
I realized that this was another way to make HST, because of another of my Sewfasst® techniques that uses rectangles to make triangles. I was in the middle of making a quilt with HST, when I needed another pair in a specific fabric, but didn’t have a square large enough. That’s where you get the hand hitting the forehead kind of insight.
To make two HST, normally you add 7/8″ to the FINISHED size of the HST, but there I was with a 3 1/2″ partial strip. So how was I going to use THAT? For the other Sewfasst technique, you add 1/2″ to the height and 1 1/4″ for width. BINGO!!!. So I added that to the width, 3″ + 1 1/4″=4 1/4″. Cut the rectangle 3 1/2″ x 4 1/4″ and made my two HST.
This formula works for ALL dimensions, even if your finished HSTs are not an even 1″ size, it does not matter:
- Add 1/2 to HEIGHT. Add 1 1/4″ to WIDTH. Cut TWO rectangles that size, placing them face to face matching edges and corners.
- 2″ finished, cut 2 1/2″ x 3 1/4″ rectangles
- 3″ finished, cut 3 1/2″ x 4 1/4″ rectangles
- 4″ finished, cut 4 1/2″ x 5 1/4″ rectangles
More important than how you mark the rectangles, whatever method, use a fine mechanical pencil or .01 or .05 Pigma Micron, any color. In other words something with a very fine point. Trouble is with a regular pencil, it needs constant resharpening to keep the fine point. The markers shown below don’t. The three in the center make light marks on dark fabric. The one on top is very inexpensive. Under NO circumstances use a ballpoint pen!!! You will rue the day!!!
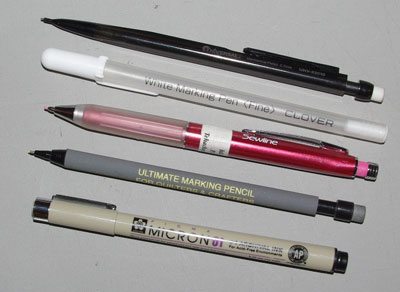
Below are the various tools you can use to mark the rectangles:
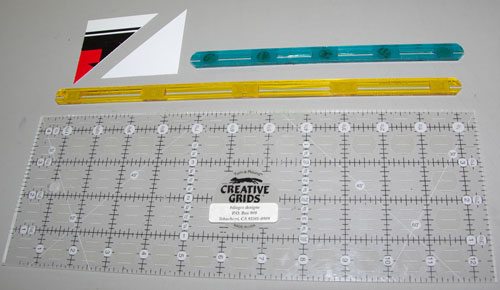
- Quick Quarter from Quilter’s Rule–two sizes-longer one is more versatile.
- Cut heavy plastic square, in half diagonally
- Rotary cutter ruler
Technique
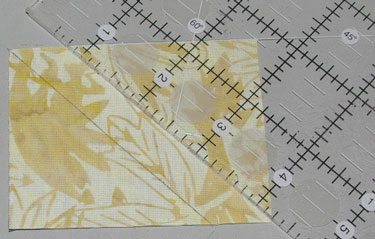
Using the Quick Quarter, draw along the OUTSIDE edges of the Quick Quarter, ignore the slits. Notice, ONE edge is at the top left corner and the OTHER edge as at the bottom right corner. VERY IMPORTANT, otherwise you will be making kites, nice but not what you intended.
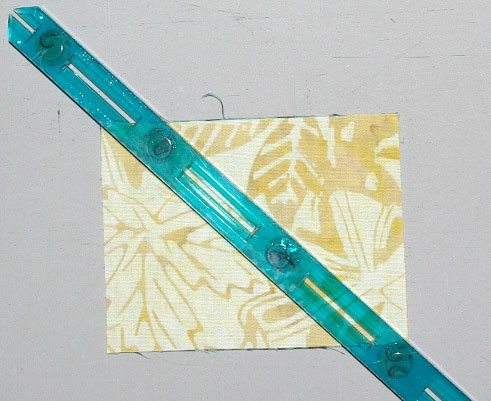
If you don’t have a Quick Quarter, it’s fairly inexpensive, under $4, cut a square of heavy plastic the size of the UNFINISHED square. For my quilt it’s 2 1/2″, then cut it diagonally in half, make sure that you cut exactly at the corners. This was a yard sign, hence the black and red print, bought at the local hardware store. Slightly thicker than template plastic, but it can be cut with a rotary cutter. It can even be used as a guide for rotary cutting, carefully so as not to shave away any of it. Makes good curved templates to use with the tiny rotary cutter.
You could also use a plastic lid from a throwaway food container for the square. Be creative, think outside of the box!
Or lacking a piece of heavy plastic, use your rotary ruler to mark the lines. Align the edge of the ruler and the 45° line with the edges and one corner of the rectangle. Mark along the ruler. Rotate the ruler and repeat for the other corner.
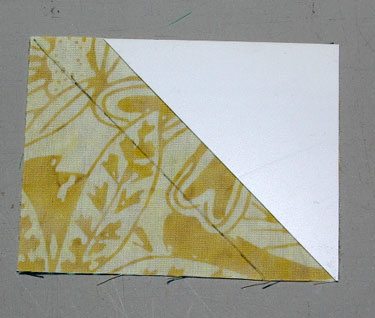
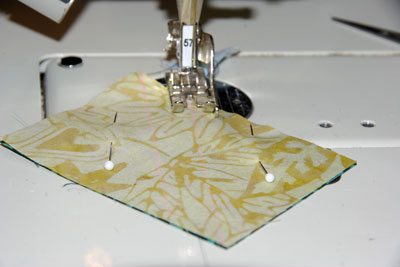
Put a pin through each triangle away from the lines. Sew on the lines, starting with the line at the EDGE. Sometimes feed dogs try to eat corners and this will keep it from doing that. Chain sew the rectangles.
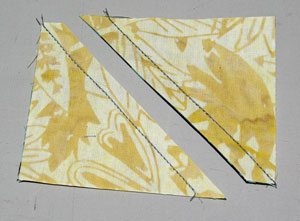
Cut apart, between the lines. Press open and trim dog ears.
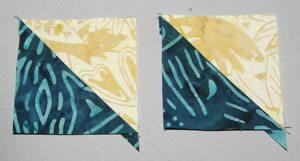
Of course, I had to use the Batiks! Why not, I will be using them anyways.
What is interesting, is that these HST seem to be more accurate, than making them using the 7/8″ measurement. Is it because of trying to get that exact measurement of 1/8? Sometimes I just added an inch and then trimmed after sewing. Now I have left that technique behind.
One more plus with this technique is that there is only one set of dog ears to remove. Please let me know what you think about this way of making Half Square Triangles.
Tags: patches, piecing, pinning seams, scrap quilt


I think this is a super way to make HSTs
They turned out more accurate for me too.
Quick and Accurate
Really like them.
Glad you like it. Have been wanting to share the technique for a while now and this was a good project for it.