
-
UFO 1-My Tuffet
Here is my first 2018 UFO Challenge project.
In the true sense of the word, it doesn’t really fit the definition of an “unfinished” project. However, it does involve cleaning out my stash and repurposing stored stuff into a useful item. Since the main purpose of this challenge is to move stuff from storage to usefulness, it fits. Think outside the “box” and finish stuff that’s IN the box!
Instead of thinking about finishing something, just do it! I am hoping that you all will join me in this challenge this year. I would like to hear from you if you are ready to downsize your UFOs.
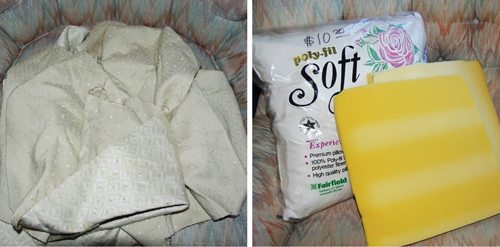
The fabric was leftover from a chair I had reupholstered more than 30 years ago. The chair went away when we moved to the mountains, however, the fabric moved with us. The pillow form and foam inserts have been hanging around for a while as well!
In the evening when I am sitting on the couch, I like to put up my feet (which was also recommended by my doctor) but there really isn’t any place to put them except on the marble/wood coffee table. We don’t have recliners, so I put some pillows on the table as padding.
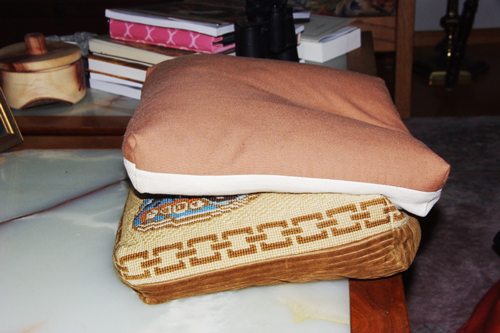 However, one is a counted thread pillow and the other a needlepoint pillow and I didn’t want to ruin them. So I decided to make a tuffet!
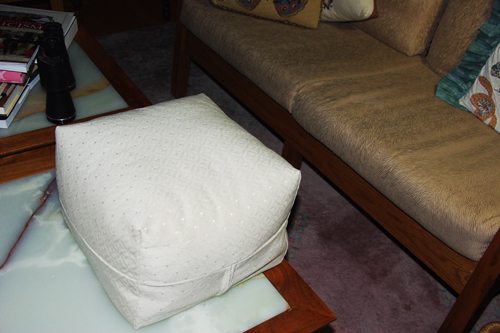
There are some very elaborate ones out there, but simple was my goal. Here is the solution: A giant block pillow. It is higher than the two pillows and feels very comfortable. It does look funny sitting there on the coffee table! It can go under the table when not in use. Our grand-daughter thinks its a great floor pillow! It went together in just a couple of hours if I don’t count taking pictures and writing on the blog!
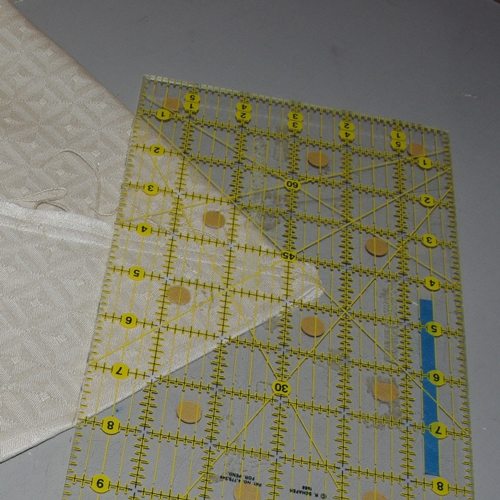
The two pillows together were about 5″ tall, but it needed to be taller. The small pillow is 11″ in width, so I figured that it didn’t need to be much wider than that. Think about how wide you want the pillow to be. Let’s say 10″. How tall do you want it? 8″ No pattern is needed because the tuffet is squared up with the seaming. So you have some idea of what I am talking about here is a drawing of what it would look like if you were to make a pattern.
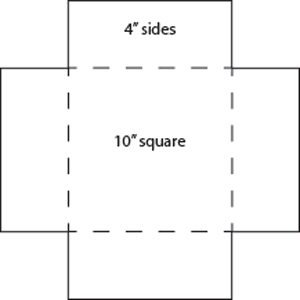
Three pieces of fabric are needed. The square for the top (18″) and two (9″x18″) rectangles for the bottom. Seam allowances haven’t been added to these amounts.
To make it wider or taller, use a larger square. Since the size of my square was limited by the scrap, I was able to cut one 20″ square and two 20″x12″ rectangles, that includes seam allowances for the zipper.
The rectangles need to be at least 2″ wider than half of the width of the square to allow for inserting a zipper.
This is not an exact science, I was going for something close to the size I wanted. In other words, I was winging it.
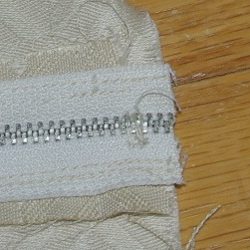
I collect zippers too, never know when you need one! The only problem was that it is a metal zipper, which presents an extra challenge when sewing it, but I will explain that later.
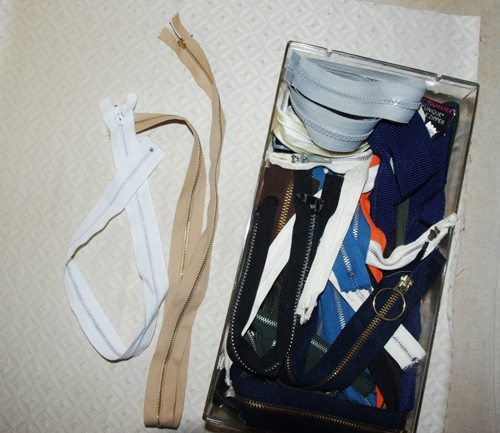
A zipper foot is not needed! Choose a zipper that is at least 1″ or 2″ longer than the opening. That makes the application much easier!
First, insert the zipper between the two rectangles. Watch how you sew the two sides in place, ask how I know that! (I hate unsewing, but I did.)
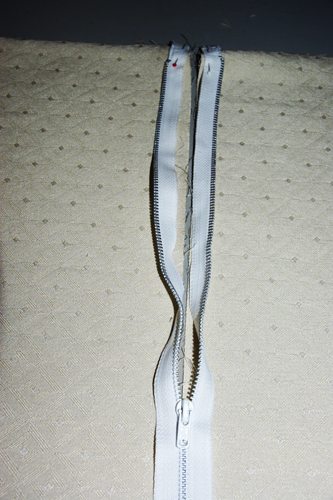
With your regular foot, place it on the zipper band, so the zipper teeth are on the outside edge of the sewing foot. Move the needle over so you can sew as close to the teeth as possible. Sew both sides of the zipper in place.
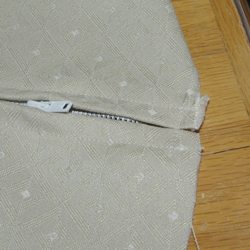
Now along each side, fold the fabric so the fold aligns with the teeth and pin in place. I sewed the seam with the needle in the center since the fabric was heavy. If the fabric is thin, you could move the needle toward the teeth. Repeat for the other side.
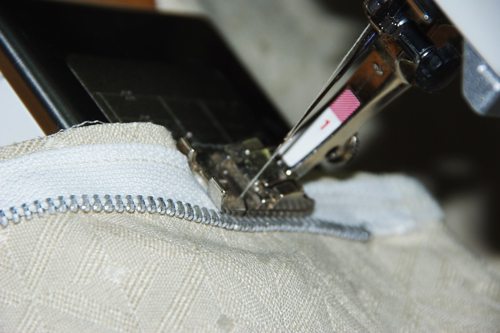
Close the zipper. If the zipper a metal zipper, overcast it by hand about where the seam will cross it when the squares are sewn together. If it is a nylon coil zipper you can sew over it with the machine. Then overcast the other end to keep the edges together. Cut the zipper off even with the edge of the fabric.
Partially open the zipper. Now layer the squares face to face, I had to trim about 3/4″ from both sides of the zippered square, so the edges would be even. Pin at the corners and two or three at all sides.
Sew around the edges, I could have sewn closer to the edge, but did use a strong overcast stitch.
When you come to the zipper, if it is METAL, DO NOT sew across it. STOP! Lift the needle and move the fabric back slightly so you can bring the needle to start on the other side of the zipper. That is why you overcast it! Don’t worry about the corners, they will disappear with the next step.
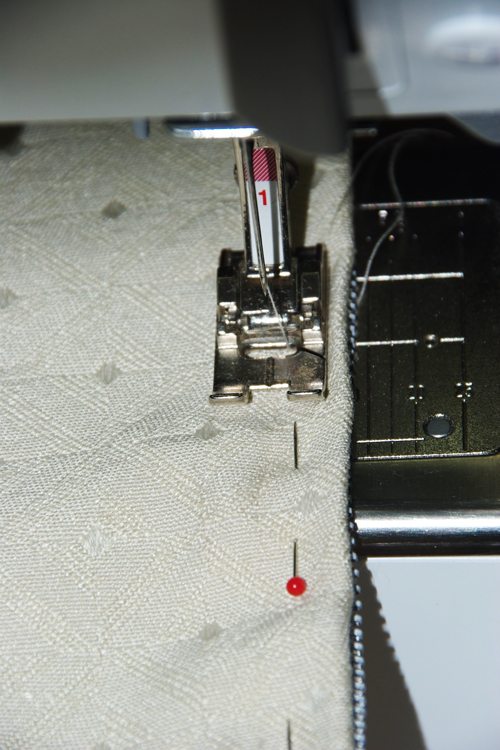
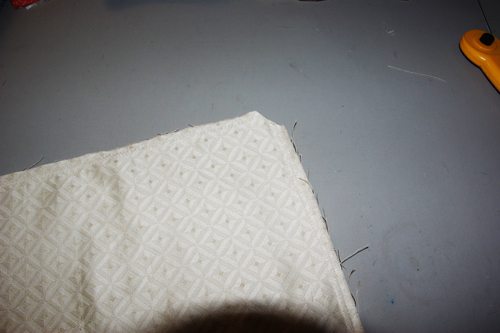
Cut off the tips of the corners, the corners end up inside the pillow so don’t worry about making a hole at the corner. Do not turn it inside out yet.
Turn and fold so the corner forms a nice right angle. Make sure the seam allowances are flipped so they nest together.
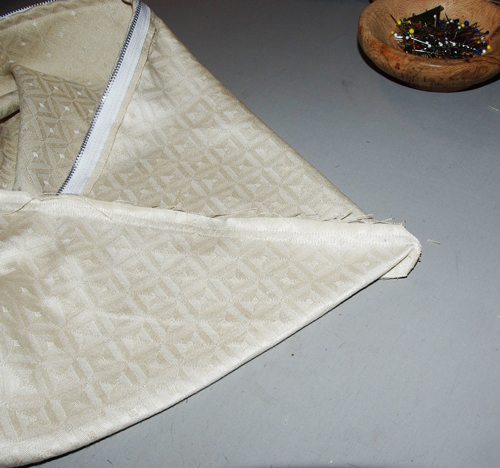
Use your ruler if necessary, align it so the angle runs across the corner and draw a line along it. Pin on both sides of the line, repeat with the other three corners.

Sew on the lines, using an overcast stitch. Do not cut off the corners. I left the corners in place because I wanted a little more padding and rigidity. Turn pillow right side out, stuff, zip shut and put up your feet!
UPDATE: My husband stole mine, so now I have to make another one!
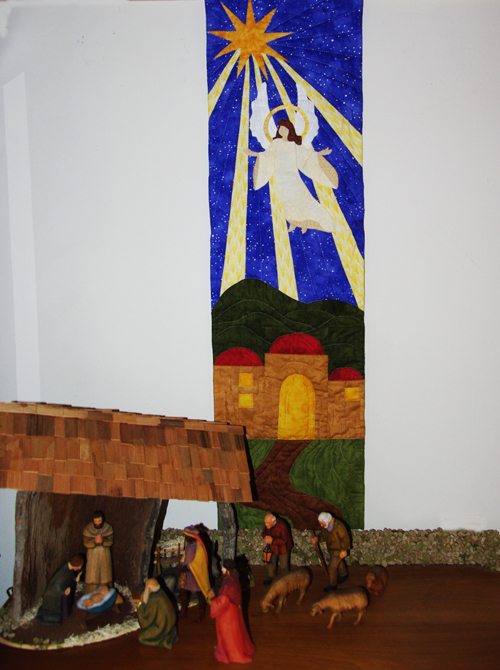
Finished hand quilting my Angels We Have Heard on High row, that was designed for the Christmas Carol Row Along, unfortunately not for Christmas 2017, but at least I will have it for 2018. It has a faced binding, which is why there is no binding showing along the edges. Hopefully, the rest of the triptych will be done by this coming December as well.
Also made three more stash-busting flutter sleeve dresses for my grand-daughter too. I took a picture of her with my flip phone, but can’t figure out how to post it to the web. You can get an idea of what they look like at the link. Very easy, each one only took a couple of hours.
So far so good with this UFO Challenge. Please share with us what you have done or what you plan to do. Remember I am keeping your names for a drawing at the end of the year!

Tags: alphabet, appliqué, batik, block-of-the-month, BOM, fabric, flowers


Hi Barbara: I just finished my first ufo of 2018. Thought I’d start with a small one just to get going. Next up is hand quilting a baby quilt with clowns. It’s been sitting here for at least five years because I don’t like the backing. Going to change out the backing and get started. I’m also still appliqueing circles. Don’t know how to add a photo here so I’ll message them to you.
Thanks, Mary, I will be posting your photos in the next blog post. Very impressive everyone!
Leaping on this bandwagon. I’m putting the hexies in a box that will travel when I do; I have a few more blocks to finish for my sampler quilt; I need to find a HUGE space to baste my massive DWR and the ‘ugly’ quilt needs rescuing – either to make it not so ugly, or to celebrate its hideousness. That’s before we approach the stash!!!!
Candy that’s great! How about sending pictures of what you are working on now and your progress. I will post them on the blog as we go through the year. Hope we have some more finishers join us!