
-
Projects Finished and in Progress
I am taking a little time off from quilting to share with you what I have been doing. When I am not blogging or on Facebook I am busy doing stuff, so when you don’t hear from me that is why. I have not figured out how to do this blogging and Facebook thing and quilt at the same time. I once said to our oldest daughter, Jennifer, that it would be handy to have a couple extra arms so I could do more things at the same time, but maybe they would get in the way. She retorted with, “If you were born with four arms you would know what to do with them.” I do miss her logic and wry wit.
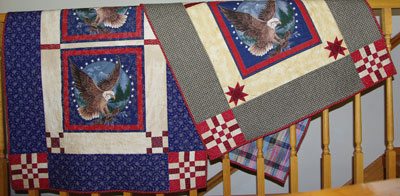
Anyways, the Veteran’s Quilts are quilted, bound and done! They will go off next week.
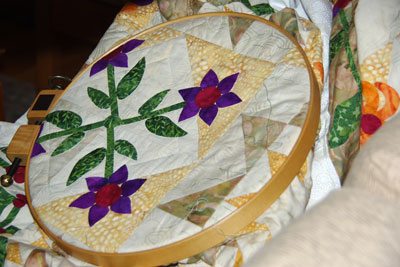
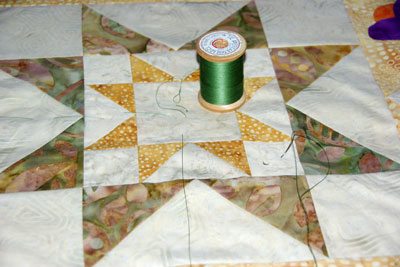
I basted the Starflowers quilt and have started hand quilting it. Seven hours into it with two blocks done. Mmmm, maybe it will go a little faster, now that I know how I want to quilt it. That always takes a little extra time.
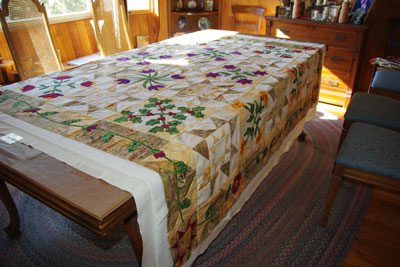
Just want to show you how I baste my quilts for hand quilting. I use my dining room table for basting, protecting the surface from scratching with table pads.
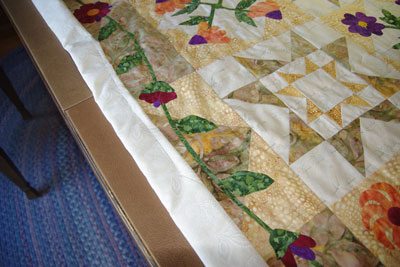
The backing should measure at least 6″-8″ larger than the top, in width and height.
Lay out the backing, right side down, smoothing it out. Mark the centers, for alignment of the batting and top. If your quilt doesn’t fit on the table, just center it on the table and let the sides hang down over the edges. Tape down the edges. Do not pull tightly, it should lie smoothly on the table. I always iron my backing to remove any wrinkles and folds.
Layer the batting, over the backing. The batting should be smaller than the backing, but larger than the top, mine was about 4″ larger than the top. Align the center of the batting with the backing. Smooth out the batting.
Layer the top right side up over the batting, aligning the center with the batting and backing.
Use old cotton thread, if you can find it, in white or pastel 100% cotton. Dark colors can leave little spots of color on the quilt top. If old thread isn’t available, spools of basting thread can be purchased.
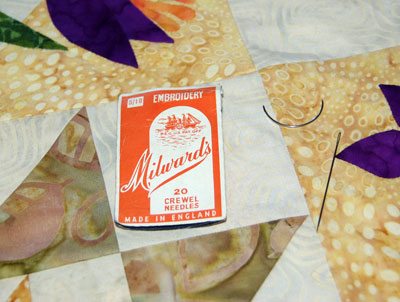
I use a curved needle, but finding very thin ones is not easy. There are ones used for upholstery, but you don’t want to make big holes in your quilt. I have found that crewel needles work well, although they are straight, you can use a spoon to help lift the point as you baste. Obviously, I have had this package for a while.
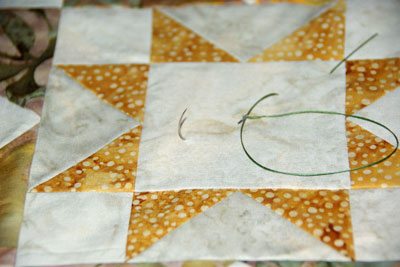
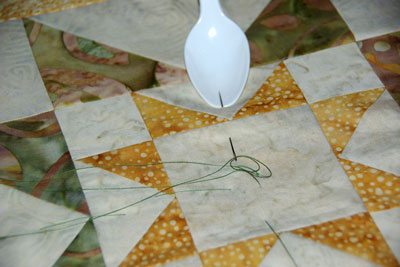
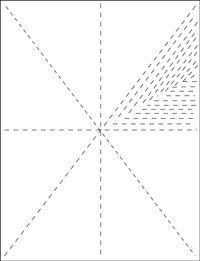
Baste starting from the center, out to the edges, from side to side, then top to bottom and corner to corner. Fill in with radiating spokes, always going back close to the center, keep the spokes at least 2″ apart. The reason for the radiating spokes is that the quilt moves along the basting as you work out from the center.
Instead of making knots at the center I use one continuous thread, starting in the middle, going one way, then go back to the center, and unroll the thread to go in the other direction. At the edges I leave a couple of inches and knot it. I do show you the one knot I made for the whole basting, it is too much trouble.
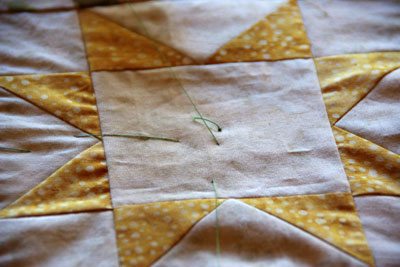
When I reach the edge of the table, for the center of the quilt, I simple let the basting threads hang. When the whole center is basted, I untape the backing and move the quilt over and retape the backing. Pick up the threads and keep going.
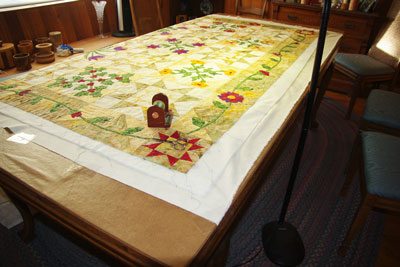
After basting, fold the excess backing and batting over the edges of the quilt and baste in place.
Here is Gandalf, the Director of Sewing. Since he can’t sit in my lap while I am at the sewing machine, I have placed a chair next to me so that he can be right there. Occasionally he reaches over to remind me that it is time to stop and pet. When I am at the computer he is usually in my lap, but that works, since I don’t have to worry about a needle in the paw. Yes, I make quilts for him too.

Tags: basting, curved needle, hand quilting


What a gorgeous quilt and kitty!
Thanks for this information about basting. It is very helpful.
Thank you Lorraine. In a way, my blog is like a diary! I hadn’t looked at this page for a long time and it brought back some wonderful memories about my daughter AND my cat!