
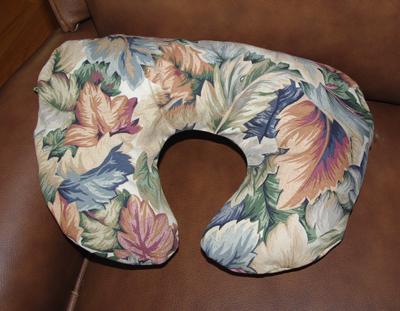
Neck Pillow
Please read through directions before starting!
- 1/2 yard–Inner fabric (Or two Fat Quarters, don’t have to match, this will be inside.)
- 1/2 yard–Outer fabric
- 20″ nylon coil zipper matching the outer fabric
- Batting, for stuffing the inner pillow
- Indelible felt marker or pencil.
- Neck Pillow Pattern CLICK HERE to access the pdf pattern.
- Sewing machine and basic sewing supplies
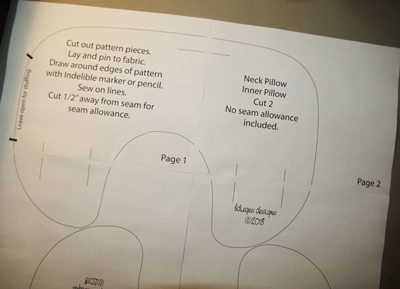
- Print out the pattern. Align the pages so they abut and lines seem to match across the gaps. DO NOT overlap the pages. Place pieces of tape along the edges of the paper to hold them in place. There are gaps because printers don’t print up to the edge of the paper, at least mine doesn’t. Just cut across the gap to make a continuous cut. The patterns you will see in the photos are my originals, but the pdf is exactly the same size.
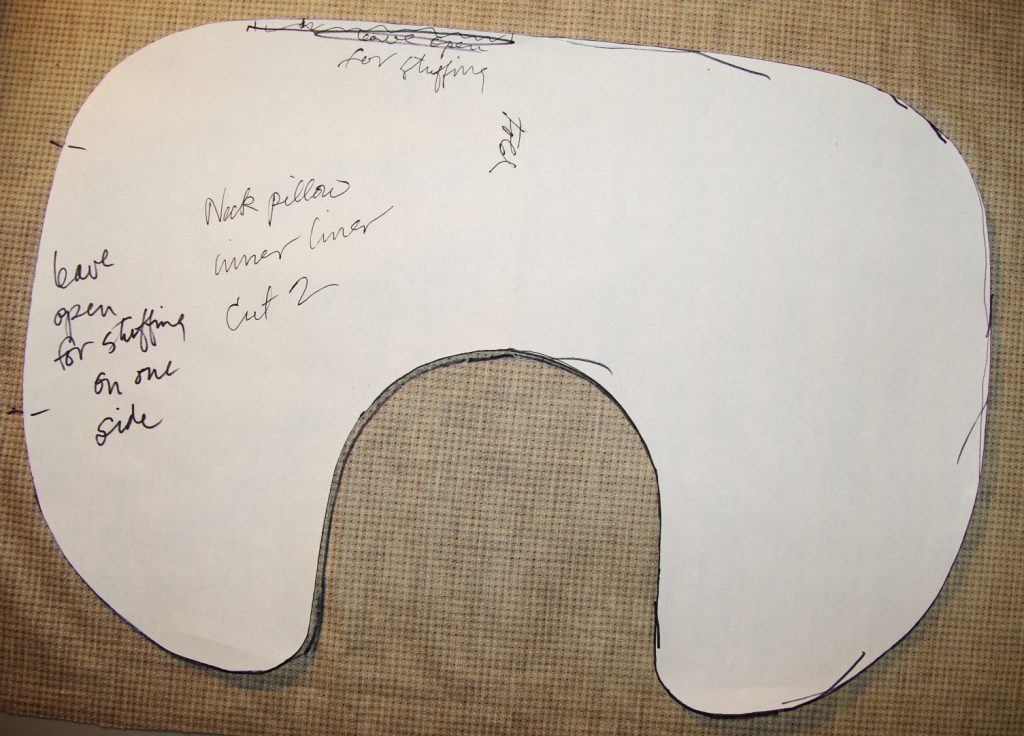
- Lay the Inner Pillow pattern on the wrong side of the folded yardage or Fat Quarters.
- Draw around the edge of the pattern. This is the SEAM line.
- Pin around the edges inside the seam line. Sew on the line, stop and start with a backstitch at the stuffing opening.
- Cut out 3/8″-1/2″ from the seam line.
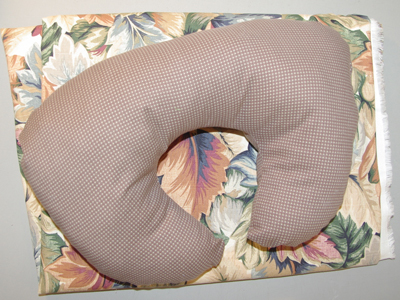
- Snip curve at the inside seam, clip just to the seam, not the seam itself. Turn right side out, stuff and sew opening closed. Set aside to make the outer pillow.
Outer Pillow
- Cut the Outer fabric in half so you have two 18″ rectangles. Set aside one rectangle to be used for the front of the Outer pillow.
- Lay the Upper and Lower Outer Pillow Pieces on the wrong side of the remaining rectangle of the outer fabric. Space them at least 1/4″ apart to draw and cut around them. Just make sure the straight zipper seams are on the straight of the fabric. If you are using a plaid or strip, you will have to decide how to arrange the patterns. Draw around the patterns.
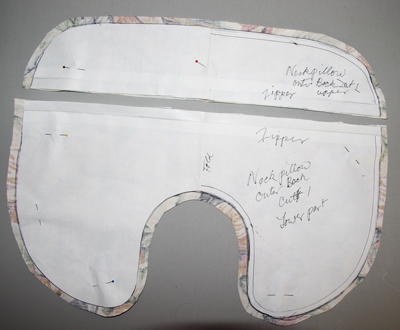
- PLEASE NOTICE IN THE ABOVE PHOTO!! Seam allowances are included in the pattern pieces for the ZIPPER SEAMS, but NOT around the edges.
Zipper Insertion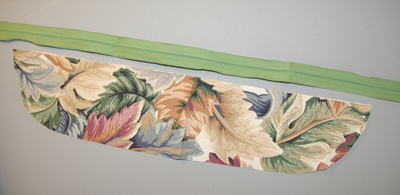
- In the photo, you will notice that the zipper is a lot longer than the fabric. This makes the insertion of the zipper easier to do and you DON’T need a zipper foot. If you feel you must use a zipper foot, be my guest, but it is not needed.
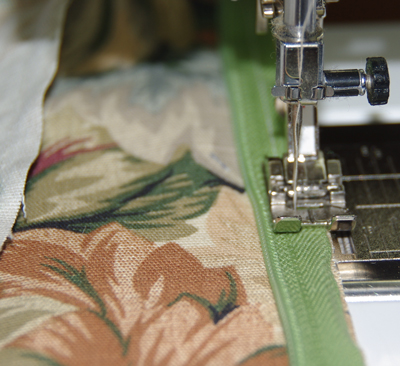
- Align the front of the zipper (zipper pull down, check far right of photo) with the straight edge and front of the Upper Part of the pillow. Pin along the seam with the points toward the beginning of the zipper.
- Place the coil against the left side of your sewing foot.
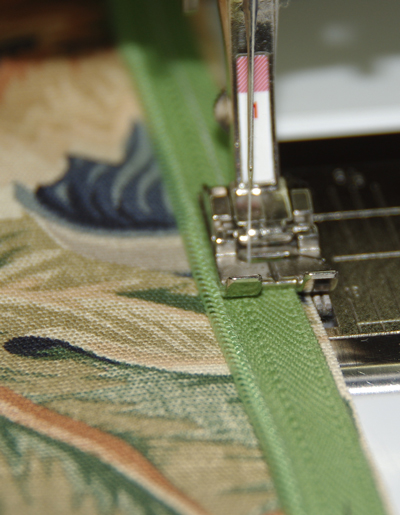 Notice I am using the regular foot and moved the needle over to the left as far as possible. Sew from one end to the other, always starting and stopping with a backstitch. Remove the pins as you come to them.
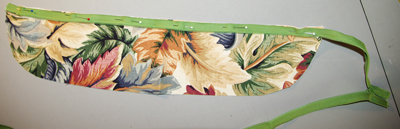
- Close the zipper. Now align and pin, with the straight edge of the Lower Part of the pillow back. Note the right side of the photo that the zipper pull is underneath.
- Open the zipper all the way to get it out of your way. Once again place the coil against the left side of the foot. Sew from one end to the other, removing pins as you go, stopping and starting with a backstitch.
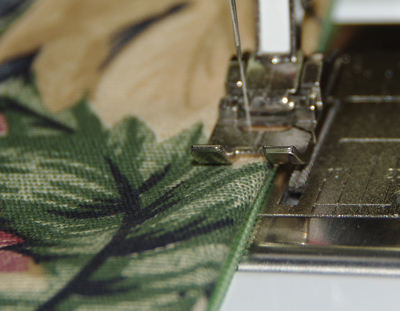
- With the zipper still wide open, sew a pleat by folding the zipper underneath and pinning so the fold barely exposes the coil. Note once again that the needle is on the far left and I aligned the fold with the opening of the foot. You don’t want to sew the pleat too close to the coil. Repeat for the other side of the zipper.
- Now close the zipper and backstitch across both ends of the zipper, out in the seam allowances. On the left side.
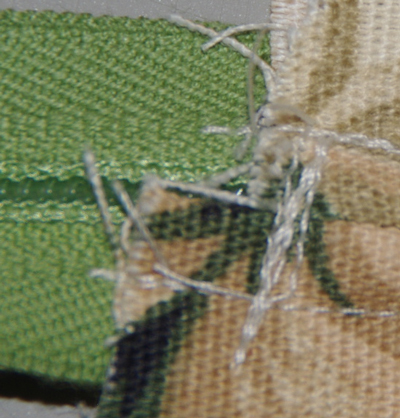 On the right side bring the pleats close together and then sew across them.
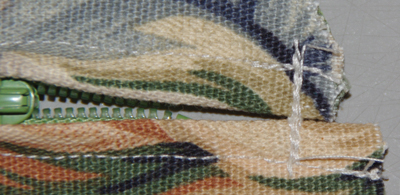
- Trim off the excess zipper and even up the seam allowances too.

- Close the zipper and lay on the front of the remaining rectangle of Outer Fabric. Pin around the edges inside the seam line. I was using scraps, so my piece is a lot smaller. The point is that it is large enough for the back to cover it.

- Before starting to sew the final seam, open the zipper slightly, so you can more easily open it once the seam is sewn to turn it inside out. Trim front evenly with the back seam allowances and clip the inner seam, carefully to avoid snipping the seam.
- Turn right side out, insert inner pillow, zip shut and enjoy!
