
-
Rotary Cutting Tutorial
The point of this exercise is that you will NEVER AGAIN need to cut a quilt patch template. Does that sound good to you? These techniques will help you figure out how to cut patches from strips and how many strips you need to cut to make your quilt.
I soon found after I started quilting that my best friend was a simple calculator, as long as it had
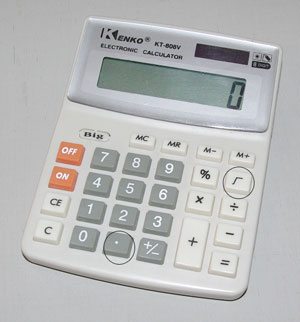 the decimal place, which they all do, and a square root function, that was all I needed. In a future blog I will explain the square root part, but for today we will talk about using the calculator to help us figure out how much fabric we need to make a quilt from a block, whether it is a Four Patch, Five Patch or Nine Patch.
Since most of the blocks fit those categories, those are the ones we are going to tackle today. On another blog, we will talk about more complicated blocks, that do not fit into those three categories.
You should also be familiar with all those little marks on your ruler, surprising how many people only look at the inch and 1/2″ markings. I am sure that does not apply to you, right?
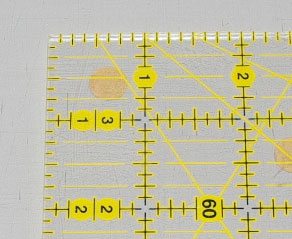 Rotary cutting rulers are marked in inches, at least in the U. S., with each inch divided into 1/8″ amounts. Occasionally, it is necessary to divide amounts that give you 1/16″, so I am giving you the compatible amount on the calculator. However, personally, if I can avoid dealing with 1/16″, I do my best to do so.
The marks on your ruler correspond to the numerals on the calculator:
Ruler Calculator Ruler Calculator 1/16″ is half of 1/8″ .0625 1/8″ .125 3/16″ is half way between 1/8″-1/4″ .1875 1/4″ .25 5/16″ is half way between 1/4″-3/8″ .3125 3/8″ .375 7/16″ is half way between 3/8″-1/2″ .4375 1/2″ .5 9/16″ is half way between 1/2″-5/8″ .5625 5/8″ .625 11/16″ is half way between 5/8″-3/4″ .6875 3/4″ .75 13/16″ is half way between 3/4″-7/8″ .8125 7/8″ .875 15/16″ is half way between 7/8″-1″ .9375 - To find the size of the SQUARE and the cut amount of fabric needed, calculate the finished size of a SQUARE. In this example we will use a 3″ finished square.
- Add 1⁄2″ for seam allowance (3″+1⁄2″=3-1⁄2″ or 3.5). This is the width of the strip to cut, from selvage to selvage.
- What is the width of the fabric (WOF)? Measure it, do not rely on the manufacturer, measure it again after washing! Since fabric widths are so variable and there is the loss of selvages, use 41″ as an average length of each strip. If your fabric is wider or narrower, use that amount.
- Divide the length of the strip by the size of the patch to find the yield of each strip.
On the calculator punch in 41÷ 3.5= 11.71429 or 11 3-1⁄2″ squares. Division isn’t exact just look at the whole number, in front of the decimal, which is the number of 3-1/2″ squares that you get from a 41″ strip.
- Divide the number of required (150) squares by that yield. This is the number of strips you need to cut.
On the calculator punch in 150÷11=13.63636 which means more than 13. Since the first number after the decimal is 6, that means it is more than half a strip. Cut 14 strips.
On the calculator, round up. If the number of strips is exact, or just a fraction, showing .1 or .2, you can usually cut 1 or 2 squares from a scrap and do not need to cut a whole strip. Although sometimes you can use that strip for another type of patch you need to cut.
- A square divided diagonally in half will yield TWO Half Square Triangles (HST). To cut them correctly, calculate the finished size, add 7⁄8″ or .875 for the size of the cut square and the width of the cut strip. (3″+7⁄8″=3-7⁄8″or 3.875)
- A square divided diagonally from corner to corner in both directions will yield FOUR Quarter Square Triangles (QST). To cut them correctly, calculate the finished size, add 1-1⁄4″ or 1.25 for the size of the cut square and the width of the strip. (3″ +1-1⁄4″=4-1⁄4″ 0r 4.25)
To calculate for Half Square Triangles, punch in 41÷3.875=10.58065 or 10 squares x 2=20 HST
For Quarter Square Triangles, punch in 41÷4.25=9.647059 or 9 squares x 4=36 QST
- Templates in quilt books frequently have the tips of the triangles or diamonds cut off. Extend these tips by drawing straight lines until they meet, then measure. This will give you the CUTTING size you need for your squares or strip. Just remember if you are measuring a TEMPLATE, there is no need to ADD seam allowance, that has already been added.
- To make a 5-patch block in a block size not divisible by 5, change the size of the center of the 5-patch. All five divisions will not be the same size, but this is not a problem and the block can be accommodated in the different sizes. In other words, for a 12″ block 4 of the divisions could be 2-1⁄2″ each, the 5th division could be 2″. In a 9″ block the 4 divisions could be 2″ each and 1″ for the center or 1-7⁄8″ and 1-1⁄2″ for the center.
- Any block can be made into any size, as long as that size is divisible by the type of block that it is, 1⁄2″, 1⁄4″, or 1⁄8″ fractions are not a problem, just stay away from 1⁄3″ or 1⁄5″, or odd fractions not accommodated on the rotary ruler:
A 9 patch is divisible by 3. (9″÷3 =3″ or 6″÷3=2″ or 7-1⁄2″÷3=2-1⁄2″)
A 4 patch is divisible by 2. (12″÷2=6″ or 6″÷2=3″ or 7-1⁄2″÷2 =3-3⁄4″)
A 5 patch is divisible by 5. (10÷5=2″ or 8-3⁄4″÷5=1-3⁄4″ or 7-1⁄2″÷5=1-1⁄2″)- Most quilt blocks that are divisible by 3 are also divisible by 2. Numbers divisible by 2 aren’t necessarily divisible by 3, using the fractions found on the rotary ruler.
For example: 9″÷3=3 and 9″÷2=4-1⁄2″ or 11÷2=5-1⁄2″, but 11÷3=3-2⁄3″, obviously not a choice.
These are just some ways to use math for rotary cutting strips into squares and rectangles. One of these days I will tell you all about how to use the square root function on your calculator.
Tags: Five-Patch, Four-Patch, Nine-Patch, rotary ruler, templates, tutorial


Thank you for this information. Very helpful.
So pleased that you find it helpful!
Thanks so much for the conversion chart. I’ve tried to figure it out on my own but I’m not very good with Math. This will definitely come in handy.
I know what you mean, I finally found the chart worked for me, so why not share it!
Thank you so much for the rotary cutting tutorial. It is a very handy thing to have printed out and nearby when quilting 🙂
So glad that this is of help to you.