
Hexagon Baby Quilt

Please read through directions before starting!
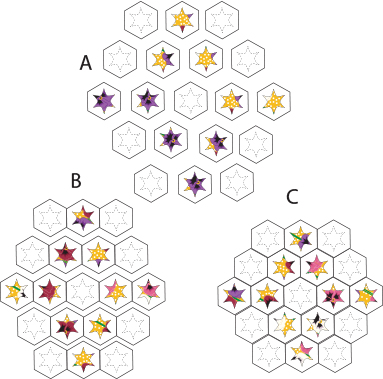
The Hexagon Baby Quilt is approximately 40″x42″ across the narrowest and widest points. The above photo shows a full-size quilt and the layout for that is below. The directions are for a baby quilt to simplify the assembly. To make it larger cut more hexagons and follow the same basic instructions! The fabric amounts are hard to pinpoint because the shape doesn’t fit exactly into a rectangle, but I have listed the minimum amount that is needed. I used muslin sheets 45 years ago when I made this quilt, so the choices were a lot different then.
Fabric Requirements
- 1-1/2 yards of 42″ wide fabric are needed for 20 hexagons, only 19 are needed for the baby quilt.
- 1-1/2 yards 100% cotton for the top fabric
- 1-1/2 yards 100% cotton for the bottom fabric
- 1-1/2 yards batting, polyester works best for this technique
- 1/2 yard of one fabric for the appliqué or one 8″ square per appliqué
For the double bed (full-size quilt):
- 10 yards each of front, back and batting. This amount allows for seam allowances and areas that are cut away because of the shape.
- 3-1/2 yards for the appliqué. No seam allowances are needed. Arrange the shapes as close together as possible.
Tools and Supplies
- Plastic template material or cardboard for the templates.
- Scissors for cutting paper and plastic to make the templates.
- Scissors for cutting fabric.
- .05 pencil with medium (B) lead for marking shapes or a washable pen.
- Quilting thread for hand quilting.
- Machine sewing thread for machine piecing, quilting and/or appliqué.
- Sewing machine and supplies
Assembly
- Cut 19 hexagons from the front fabric, back fabric, and batting.
- To save as much fabric as possible. Draw around the template, then trace another one so the lines are shared.
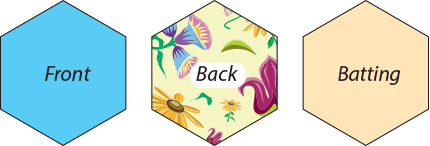
- Layer front and back fabrics, right sides together and a batting hexagon on the bottom, matching edges and corners.
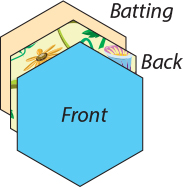
- Sew a 1/4″ seam, through all three layers, along five edges. Start and stop with a back-stitch.
- Turn right side out, through the open side.
- Tuck in raw edges 1/4″ to make a smooth edge and baste shut.
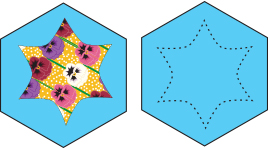
- Hand or machine quilt the six-pointed star in the center of nine hexagons. Cut the same design for the appliqués and machine appliqué them on the remaining ten hexagons.
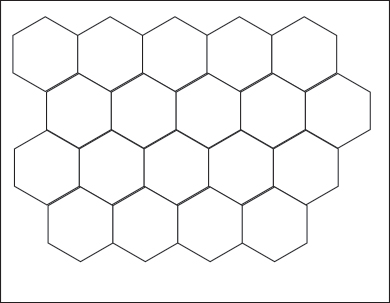
- Arrange hexagons as shown in the diagram.
- Join hexagons into rows by machine.
- Lay the hexagons next to each other, but do not overlap. Use a decorative wide zigzag.
- Make sure all the open edges are joined to another hexagon so no open edges end up on the outside edge. Otherwise, you will have to close those edges by hand.
- Join rows together with the same method. Remove basting stitches and your quilt finished. No binding required.
Here is the diagram of the full size, approximately 93″x112″ quilt.
