-
Fleece Mittens Tutorial
- Posted on December 3, 2012
- by bdieges
- in Blog
- 3 Comments.
I get the feed from Bernina’s We All Sew and there were some “convertible” mittens as a project, with a little cap, so the fingers could be free for “texting.” I recalled seeing this, when my friend, a Southern California girl who just moved to Iowa, was telling me about how cold it was going to get.
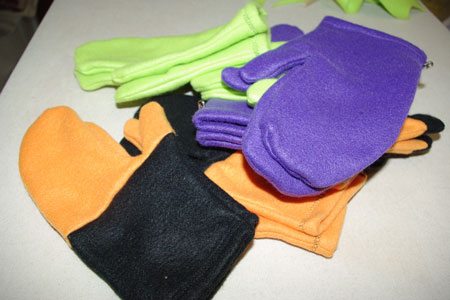
So I decided to adapt the pattern to make mittens for her four children, the point is to keep their hands warm, so I didn’t bother with the convertible finger covering. Then when I bought the fleece at Joann’s, the lady cut the 1/4 yard a little close, so to get the height from wrist to fingertip, I had to sew two colors together. The pattern can’t be be turned, since the stretch has to be from side to side. These aren’t perfect, but warmth is the point and the nice thing is that they are reversible!
Next time I will get 3/8 yard of a print, to make sure to have the right length, from fingertips to wrist. Although, from four quarter yards, I was able to make eight pairs of gloves, but 3/8 yard would have given me a little more leeway.
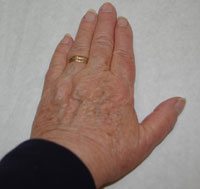
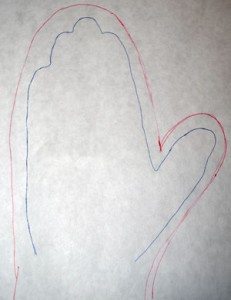
- Trace the hand with the thumb out stretched, at an angle.
- Then add 1/4″-3/8″ all the way around, a little more at the thumb, to allow for the thickness of the hand and the seam allowance,
- Add at least 2″ at the wrist, to allow for a hem, and so that the mitten isn’t too short.
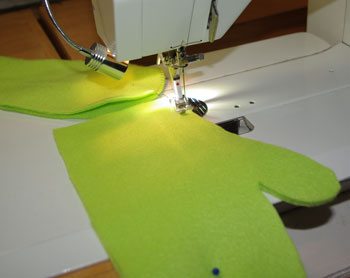
On my Bernina 930, I have a few stretch/overcast stitches, and these are the best to use for knits, since the stitches won’t be as likely to break.
I asked my friend to trace and scan her children’s hands. It took me a little bit of time to get it figured out, how large they should be, but I ended up making a test mitten and then once I figured that out, they went together quickly
I couldn’t figure out the wrong or right side of the fleece, but figured it curls to the wrong side, so that made my decision easier.
Here are the tools and ingredients you need to make these mittens.
- Polyester thread
- 3/8 yard fleece or
- 1/4 yard each of TWO different fleece fabrics.
- Sharp knife edge scissors or similar shears for cutting thick fabrics.
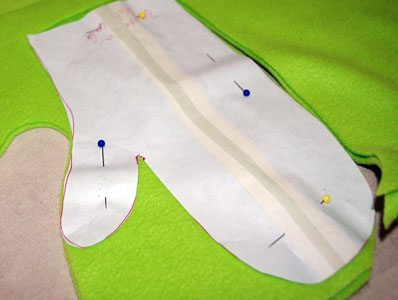
Cut paper pattern and pin to two layers of fleece. Cut around pattern. Cut two pairs. I had not allowed enough for the thickness of the hand, so I simply slit the pattern and used masking tape to tape them together 1/4″ apart. Why not cut a new pattern? Who knows, that’s just me.
Pin layers together and sew around thumb side stop at the top of the mitten.
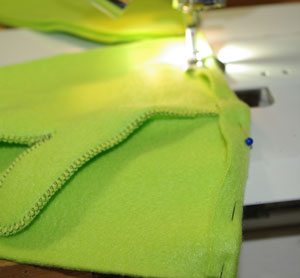
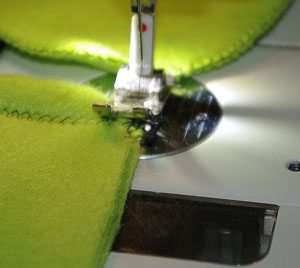
Open and fold back about 1/2″ for hem at the bottom. Sew hem with the same stretch stitch or switch to another one. It is easier to sew the hem when one edge is open.
Bring edges together and sew from hem edge up to the top of the mitten. I started sewing at the edge of the hem and then backstitched to the edge of the mitten and then finished the seam. I wanted that seam to be strong where the two edges came together.
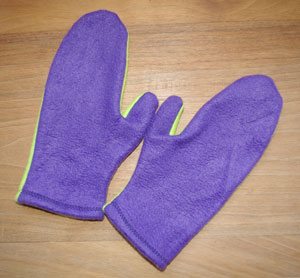
Turn right side out. Repeat with the other mitten.
There was just enough fleece of two colors left over for me to make myself a pair, they are reversible. Ready to play in the snow!
If you enjoyed this article please consider sharing it!
3 Responsesso far.
Leave a Reply Cancel reply
This site uses Akismet to reduce spam. Learn how your comment data is processed.




I purchase matching or co-ordinating rib knit fabric and stitch it to the wrist of the fleece mitten making the rib knit a bit longer so it fits neatly into the sleeve. You get a much nicer finish, smarter looking mitt.
Oh what a wonderful idea! I will keep that in mind the next time I make them. Thank you for the hint.
And her friend and her friends kids loved them. They were made with love.
Thank you.