-
Snappy Little Bag
- Posted on April 28, 2014
- by bdieges
- in Blog
- No Comments.
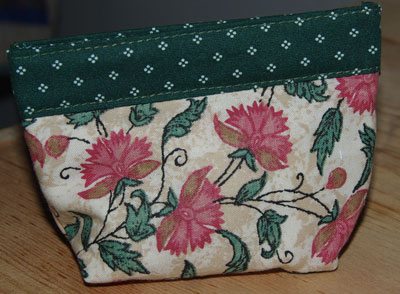
This little Snap Bag was being made on Gourmet Quilter and I thought that it would be fun to make one, too. Actually made a bunch for Christmas gifts! The closure is made from pieces of metal measuring tape.
I made mine a little shorter than hers, but it fits better in my purse at this size. These can be made any size, longer or wider. Although as she suggests, use a heavier measuring tape for the closure, if yours is going to be a lot wider.
In the video, she gives you most of the measurements, but not the lining length, because your metal tape may be wider or thinner than hers. I thought 1-1/4″ would be enough at each end because my tape is 1/2″ wide. I found that I needed to add 1-1/2″ at each end, so 3″ total for the extra length of the lining. So 1″ to fold over the tape and then 1/2″ to allow for the seams at the edges of the folded over lining. So if your tape is 5/8″ add 3-3/4″ to the length of the lining. I have seen these made without the extra stitching at the top and bottom of the closure or simply inserted between the lining and the outer fabrics, but they don’t look as classy as her’s does. That contrasting fabric at the edge adds to the look.
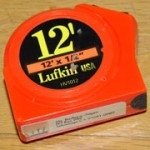
I had an inexpensive 12-foot tape, that needed replacing, didn’t retract well and thought this was an ideal use for it. Isn’t this called “repurposing?”
The metal tape can be cut with scissors, but make sure to use “paper” scissors, in other words, NOT your good scissors. Pull out the tape, the full length and cut it off. If you cut off the tip and it retracts, you will never get to the rest of it, without smashing the housing. You can see how I plan to store the remains. From a 12-foot tape, plus the extra foot of blank tape at the end, I will get at least 17 little bags, with measurements of TWO 4-1/4″ pieces for each bag.
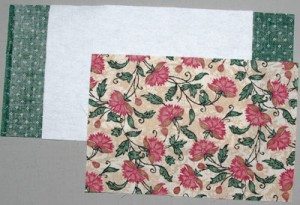
Instead of thin batting, I used white flannel, since I didn’t have the batting and figured it would serve the same purpose.
Since I was making the purse shorter, I cut the outer fabric and flannel 5″x7-1/2″, added 3″ to the latter amount and cut the lining 10-1/2″ x 5″.
I noticed that she simply put tape over the ends of the measuring tape, but I didn’t like those sharp corners, so I rounded off the corners, just slightly. Hold the measuring tape pieces over a wastebasket, when you snip off the corners. You don’t want tiny metal pieces ending up on the floor. I know I didn’t have to tell you that, but just in case.
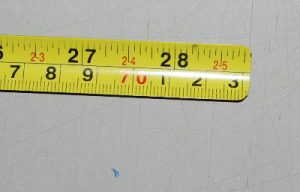
After trimming off the corners, I used painter’s tape to cover the ends since that is what I had. Or use duct tape.
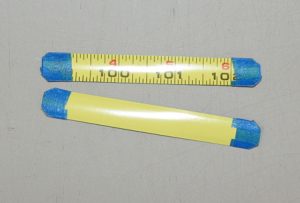 Masking tape dries out eventually and discolors, so it might affect the fabric. I really like her technique of starting away from the edge, backstitching to the top and then moving forward. I have to remember to use that for other purposes too, especially when that edge is exposed. It strengthens it too, so the seam doesn’t unravel easily.
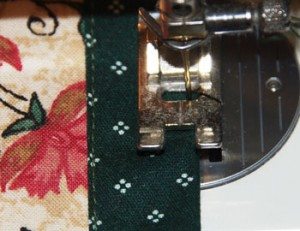
When I stitched the narrow seam along the edge of the casing, I used the inside of the foot to guide me and moved the needle over one notch to the left. Did the same for the other side, just moved the needle to the right.
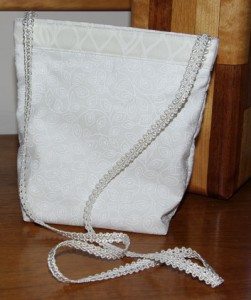
Using these same techniques, I made a little shoulder bag to go with my
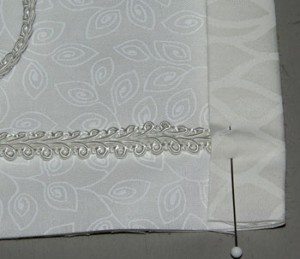 Granddaughter’s First Communion dress. How to attach a strap was an issue, but I figured it out, simply tucked it under the lining flap/pocket, that is formed to hold the metal tape. Stitched across it, then folded it back and caught it in the stitching at the upper edge.
I made her bag wider, so the outer fabric and flannel were cut 6-1/2”x14”, and the metal tape pieces 5-3/4”. An off white fabric in my stash became the lining, which was cut 6-1/2”x17”.
If you enjoyed this article please consider sharing it!

