-
Baby Quilts
I didn’t realize I never posted this baby quilt blog. I am so behind on my blog, been up to lots of things, taking pictures, but not posting! Shame on me!
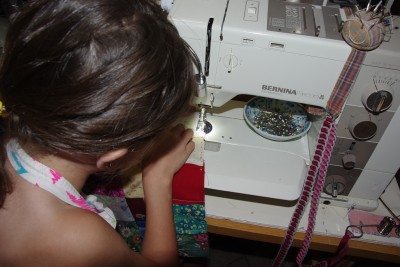
Since we came home from our trip to San Antonio, in May, I worked on this baby quilt for my niece. Teaching a couple of classes at Academy of Quilting, Sewfasst is in progress. Then we had the grands here for 10 days, so nothing was done in my studio. Excuse me, lots was done. I showed my youngest grand daughter how to sew, she made two doll quilts and helped the oldest grand daughter hem a piece of fabric she is going to use for a cape for a dress up ball. We baked and made lavender mint tea, using home grown lavender and mint.
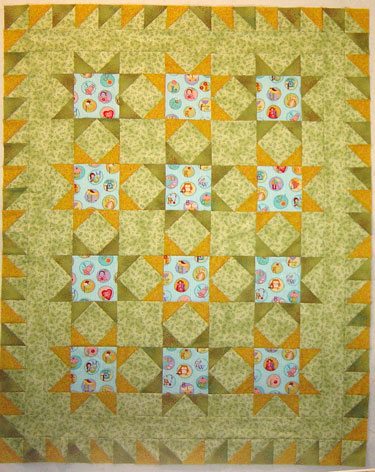
Here is the baby quilt for my niece. Her baby girl was born end of May. I didn’t get it done for the birth, but sent it off by the end of July. The pattern is based on my I Spy quilt using Sewfasst® techniques, just cut squares to make all those triangles.
I made one for my daughter too, since they are to waiting for an infant to foster. I wanted to get the piecing and quilting done on both at the same time.
Quilting a quilt is so different from piecing, since you have to change the feet, use different type of thread and clear the table behind and next to the machine. So when I do all that I like to be able to quilt more than one quilt at a time.
Decided to put minky on the back, but was very hesitant in doing it, for two reasons, I had never used it before and had heard that it was not fun to machine quilt. Well, I inquired among my quilting friends on Facebook and was reassured that it was not a problem, so I dove in. One issue, keep the vacuum handy! When you cut it, the fibers are all over everything!
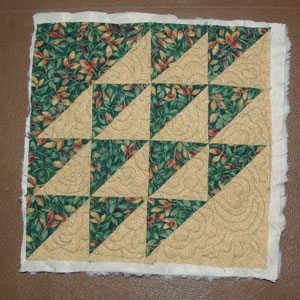
I quilted an orphan block and it was a delight to quilt. I basted the baby quilts very thoroughly with the Pinmoors, so there would be no shifting.
The first quilt turned out great. However, AFTER quilting the first quilt, when I opened my bobbin area to clean it out, look what I found!
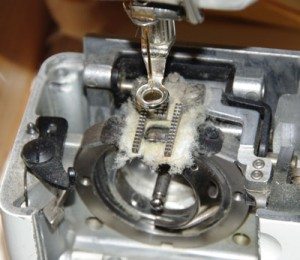
So be aware!
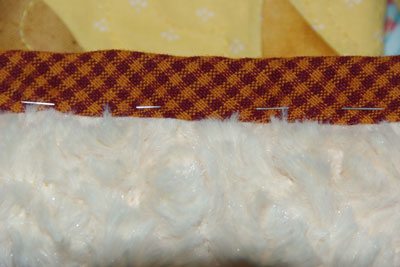
It was suggested that I turn the edges of the minky over the front to bind, but decided to go for a traditional binding. When I machine sew a binding, I cut it just a touch wider than I would if doing it by hand, so that I have a little extra. I pin every inch, from the front, with the pins going through the back, catching the extra amount. Yes, it is extra work to pin, but then you know you will be sewing the binding and not missing any, besides it still is quicker than hand sewing.
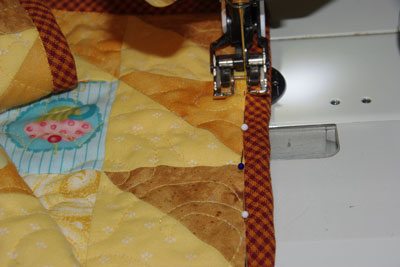
Then I sew in the ditch, with the walking foot, removing pins as I sew, with the needle down. Notice the pins are pointing toward the foot, so the pins slip out easily.
Thank you for stopping by, I plan to keep more up to date. Let’s see if I can stick to the plan! Oh one more thing, the minky quilts feel so good, I plan to make a cuddle quilt for myself!
Tags: baby quilt, minky, pin-mores, Sewfasst


